
Watches - a Journal
Welcome to my longest continuous project: learning to make custom watches. I've learned a lot already, but still have a long ways to go. If you are interested in following along as things develop, please email me. You will be first in line if I ever release something to the public. Just... don't expect that to be soon.


The start of this ongoing journey
Most of my projects are impermanent, and the creation process is of greater focus than the end result. I disassemble my robots for parts days after the build is final. My water-cooled PC lasted just a month before I sold the parts for a profit on eBay. I hate much of my art, and often throw paintings and drawings away before documenting them.
As one of my hobbies is buying and flipping things on Craigslist, most products in my life follow a similar pattern. I have purchased, extensively used, and then flipped cameras from nine different brands (Ricoh and Leica are my favorite so far). The same has applied to phones, cars, computers, and living locations... nothing is kept for long.
But there is one exception: Watches. For whatever reason, watches are different.

As both an engineer and artist, it is natural that I love watches. But more than just appreciating them for the combination of design and craft, each watch in my initial collection was a gift. This is likely what makes them different for me. I value the associated memories in a way that doesn't seem to happen with other physical items in my life. My first two watches were purchased by my dad at important points in his live, and handed down to me at important points in mine. They have been everywhere, from my dad's childhood home in Zimbabwe, to diving with me in Aruba. Instead of aging into obsolescence, they almost seem to grow. They are an antidote to my typical short-lived projects and quickly flipped products. This permanence, my appreciation for the craft, and positive memories of gifts in the past made me interested in being able to make custom watches for friends and family.
With this goal, my journey into watchmaking begun.

I went into this knowing nothing about watch construction, but I did have some unique and relevant technical experience that I decided to leverage. One of my first jobs was at Moog Aerospace. There I worked with their DMLS Titanium 3D printer. This a serious process: the entire room was flooded with argon gas during the print process to reduce the risk of combustion. This technology completely upended the standard hydraulic manifold design process, allowing you to design curved internal fluid pathways and consolidate many parts into one. But to go along with these major design enablers, I also learned and experienced the various unique, and occasionally unintuitive, design constrains. When done poorly, parts came out warped like Pringles with poor surfacing and risk of fracture propagation. When done well, you could create parts that didn't seem like they should be possible. It is this "wow" moment that results when all the stars align that made me decide to start with this technology.

At this point, I was aware that several companies sell "DIY Watch" kits, and there is plenty of information showing how to buy components online that will fit together. I could simply buy the parts and assemble them... Ta-da, a "custom" watch. After some practice doing this, I could then later graduate to custom dials, and perhaps after that attempt custom cases.
That would be the logical path. However, this would be boring. Also, I wanted to have something that I could gift, and "here's a collection of AliExpress parts that I assembled" wasn't what I was going for.
Instead, I went the fully-custom (save for the movement) route. Here was my initial to-do list:
-
Complete: Figure out how the hell a watch is even made...
-
Disassemble and reassemble all watches I own
-
Research best practices for gasket design, crystal setting, and waterproofing
-
-
Complete: Metal 3D print service evaluation
-
Research DMLS alternatives, such as Binder Jet and Wax Casting
-
Design test prints that evaluate relevant performance (warping, hole geometry, etc.)
-
Send test prints to 3-4 companies offering metal print services for evaluation
-
-
Complete: Explore finishing options
-
Experiment with standard hand-polishing techniques, both on Stainless Steel and Titanium
-
Evaluate available oxidizing finishing kits on Brass and Bronze
-
Try finishing/polishing only certain faces for 3D effects
-
-
Complete: Learn Enameling
-
Practice the process of firing enamel with a hand-held torch
-
Experiment with unibody case/dials: single part, with pools of enamel in the dial area
-

Prototype A
After completing my to-do list, I started the fun part: design.
Research from James Clear has shown that when it comes to new artists, a focus on quantity actually produces higher-quality results than focusing on quality. With this in mind, I started out by designing and 3D printing 25 different case designs. Some were good, many were terrible. Some designs looked good in renders, felt poor on-wrist, and others were the reverse. I tried to ignore what I had learned about watch construction in the prior step of this process, and to focus on creativity over feasibility. Engineering would come later.
This was a lot of fun. I wanted something different, because I didn't want to waste money fabricating a derivative design. As watches have been around for a very long time, there is an allure to trying to come up with something new in this very crowded space. While I wanted my designs to avoid falling into categories or cliches, I didn't want to achieve that by simply caking on extraneous bullshit. That's the easy way to achieve uniqueness -- but I'm a fan of the Cartier Crash, I'm not a fan of watches like the Devon Tread or Xeric Scrambler.


After this initial brainstorming work, I started to get a very rough idea about what my personal design language might look like. I wasn't happy with it (I probably never will be), but at least I was able to weed out a lot of ideas that didn't work. I also got a sense of the size and shape that I preferred, which is around 39mm in diameter and tapered.
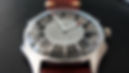
I picked the best of my designs, ordered it to be 3D printed out of Stainless Steel, hand-fired an Enamel dial, and assembled my first watch: Prototype A.0.
Below are some photos that show how this turned out. If you want more, see build video here.


The first thing that I discovered: making an enamel watch dial is very difficult. If you follow the tutorials online for making enamel jewelry, you end up with a piece that is much too thick, with edges that are much too imprecise, for a watch face. If you go lighter on the enamel, you get micro-cracks and a spotty finish.
I made many beautiful disasters. After several days and many hours, I got a green dial that was "good enough" to use for this first build. This dial wasn't as glossy as I wanted, but it was more level and uniform than my other attempts. I continue to experiment enamel on the side, and am getting better at it, but I had to just roll with this quality level for this build.

The second thing that I discovered: When it comes to metal 3D printing services, you get what you pay for. I had the case printed using Binder Jet technology, due to the low cost. The dimensional accuracy left a lot to be desired, and there was some warping that I had to pound out with a mallet. After some "adjustments," I was able to I was able to assemble it with an ETA 2 Hand Quartz movement and sapphire crystal. While both the dial and case were more rough than I wanted, the final piece turned out pretty nice for my first attempt.
I got community feedback from friends, as well as YouTube and Reddit. People liked the arch design of the watch lugs -- the friend who I gifted the watch to called it "baroque... in a good way." To my surprise, a lot of people also liked the rough surface finish. The dial and hands, however, had mixed feedback. Most people online didn't like the dial at all -- no numbers, no interest, just boring. In person, the dial got praise for how it looked outdoors (where the enamel shimmered), but also comments that it almost looked black indoors
With that feedback received, I started working on my next design:
Prototype B

When I ordered the parts for my 1st watch, I happened to purchase several types of crystal. After assembling the first watch, I was messing around with the remaining parts. I noticed that the high-dome version of my acrylic crystal had a magnification effect on the edges. This gave me the goal for my next design: turn this magnification effect into an optical illusion. I figured that if I created enough dial depth near the edge of the crystal, I could make a watch that looked deeper than it was thick.
With that goal, I made eight different prototypes that played with this idea. I designed around a very small movement, which let the dial depth extend to the watch back. Five of these designs were garbage and I won't be showing here, 1 looked like a birth control pill dispenser, and 2 were decent. The two decent ones are on the right in the image above. Of these, I chose to go forward with the design on the right. The arch design of the dial shared themes with my first prototype's lugs, and this common visual element aligned with my goal to start to create a "language" of sorts. They are totally different, but if you told someone they came from the same lump of brain matter, they'd probably believe you.
So I took that design, and submitted it for metal 3D printing to 5 different online services. It failed the "checks" for all 5. Great. There is both a min wall thickness that you can get away with, and a min gap that can be added between each of the arched minute markers. Given that the number of markers was fixed at 60, and I didn't want to increase the watch size, I seemed stuck...
Then, two things happened: ProtoLabs reached out with a "creator grant," and the design passed the checks to be wax-cast by one of the online services. As someone who watched MythBusters as a kid, I love the "parallel paths" method of development. Instead of trying to pick the best option... just try both! I submitted the design to be wax cast out of brass, and then worked with an engineer at ProtoLabs to modify the design such that it could be printed with their DMLS machines. This process with ProtoLabs let us design much closer to the functional limits of the equipment than the automated "checks" done by less expensive online services.


First came the total-loss wax cast. For this method, a wax positive is created using SLA 3D printing. Then, well the name says it all -- the wax melts away, and the cast part takes its place. The finish of this cast brass part was wonderful -- far better than any 3D print. The accuracy was not. Notice the dome in the center of the dial in photo 2? That was supposed to be planar. I pounded the center of the dial flat, and then assembled my first version of prototype B.
Ignoring accuracy, this brass prototype came out great. In order to see the different possible finishes, I polished it, then brushed it, and then aged it with salt and vinegar. I showed each option to the friend who would be receiving this build, and he picked the aged option. This is an acquired taste, but I do feel that this design works well with this finish... it's like an old artifact you'd find exploring the ruins of Atlantis.

Next up, the DMLS prints arrived, and for the first time in this entire project they were dimensionally accurate enough to assemble without modification. I compare the materials in this build video here.
And after quite a bit of polishing, I throw the hands and acrylic on, and... hey, the illusion works!
Something about the warm hue of the inner shadows on the brass prototype kept your eye from noticing the extreme dial depth quite as much as you do with these cobalt chrome and titanium prints. The depth of the dial really is a highlight.
Of the three builds (titanium, aluminum, and cobalt chrome), the cobalt chrome one feels the best in hand. The titanium and aluminum prints are too lightweight to feel solid once paired with the acrylic crystal and the thin design. I don't plan to do another aluminum build, and if I do another titanium one I will bulk up the wall thicknesses where possible in order to make it feel more robust.
While I'm not happy with the finishing, reactions to the design of this second prototype have been more positive than my first. I gifted some, and everyone has reported getting plenty of interest and compliments while wearing. The key critiques are my choice of hands, the use of acrylic, the quality of my polishing, and the design of the back of the case. These are all very solvable problems: it's better to have a good concept and poor execution than a poor concept with good finishing.


At this point I have 3D printed 40 different watch designs, and built prototypes out of six different materials:
-
Binder Jet, Stainless Steel
-
Wax Cast, Brass
-
DMLS, Titanium
-
DMLS, Aluminum
-
DMLS, Cobalt Chrome
-
DMLS, Stainless Steel
So what's next? Well, check out the CW + CH page for my latest project!